
BUTTERFLY BLOSSOM (WAFFLE FLOWER)
- Ken Chien
- Feb 15
- 3 min read
Updated: Feb 19
Talk about being inspired. I had just began taking notice of the brand around Black Friday 2024 (I’ve been preoccupied with Interactive Pop-ups!). And while I knew of the company as the go-to four nesting shape dies and MISTI Sticky mats, I was surprised to find out that they pioneered the ongoing Postage Collage craze.
So no need for more words, I was on a shopping spree with these wonder stencils and dies. Then I noticed something interesting on the website, it was a sneak peek blurb subscription! I LOVE subscriptions because I either enjoy getting the products before general release or I’m afraid to miss out on anything special. This was perfect - except for the note that informed this subscription does not extend to international customers. My excitement turned to despair, but I decided to email customer service…it doesn’t hurt to ask. To my really pleasant surprise, Nina wrote back and said if I agreed to the shipping fee (I think it was UPS?) then she would let me join the subscription. I’ve been paying FedEx and UPS shipping fees everywhere I go, of course I didn’t mind! (Little did I know to me it’s just a fee, but it ended up making a mess with their shipping system…I feel horrible!).

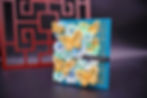
Then between all the Black Friday orders then the arrival of all the boxes I forgot all about this. Till the day the February kit arrived, with it, the cutest plastic envelope, everything was coordinated. I saw a full A2 sized die, a 4 piece matching stencil set, and a sheet of subsentiments. I looked at the die, I’m not very familiar with what a texture die is…but was eager to cut a piece out. The theme was Butterfly Blossom and by the time I poked the card stock out of the die I could see the potential for layering and DIMENSION! These perfectly layered blooms and butterflies were separated by little punched holes an score marks. Just by cutting out select butterflies and stacking them would be a gorgeous dimensional cover. So started my daily experiment for this next week.

First, I just inked it with the stencil and played with the stacking. Gorgeous texture, and I love uneven borders, so I cut it so it was a top folded card.
Next up, an Chinese inspired and expanded card. I brought it up to A6 by adding a cover die behind it. Using an Asian palette, I was astonished by the result.
Later, I added fencers and popup butterflies to complete the inside of the card.
Then on the third day, I decided the butterflies needed to be patina. The structural texture of the patina was grunge-y perfect.

Later I added butterflies cut out of vellum to contrast with the metallic patina cover.
Day four, I wanted to go black. Then color it with Lisa Horton’s interference inks that looks almost neon on black stock. These inks are really quite stunning in person.

Day five, let’s cut it out of vellum, then water color it from the backside for a soft blended look.

Day six, if vellum turned out a bit soft, let;s go acetate and gold leaf gilding. What a sight with the right lighting.

Day seven, It’s time to go interactive and make a waterfall card. The pieces separate and regroup together seamlessly for this technique.
Day eight, i became obsessed with the idea of everything in black and white (and gray), covering the tiny gift box and gift bag, containing an Altenew craft-a-flower in bright red to contrast this stunning display.

Day nine, I ran the cut out through one of Waffle Flower’s stitching pinking cover dies. I was way too confident in my stitching abilities. Immediately I changed my plan to just stitching the blooms (hard enough!) and triple up the butterflies and fold it open for some wing fluttering illusion.

Day ten, I love this trick. Create a fake front that flips down when the card opens to reveal something else. But in this case, the transformation of butterflies from black and white to bright colors still intrigued me, so this took a lot of matching and fudging, but I liked the result.
I’ve never been this fascinated by a design cover die. This truly piqued my interest at Waffle Flower’s as a brand. I checked out their website then their YouTube channel. I was so aching to get my hands on their sold out Open Book die, I located it in an Aussie store, had it shipped to a forwarding service in the US then route it to Taiwan. Just got it yesterday, can’t wait to play with it. Truly a hidden gem of a innovative boutique crafting marvel.
By request, the making of the waterfall version of this versatile die: